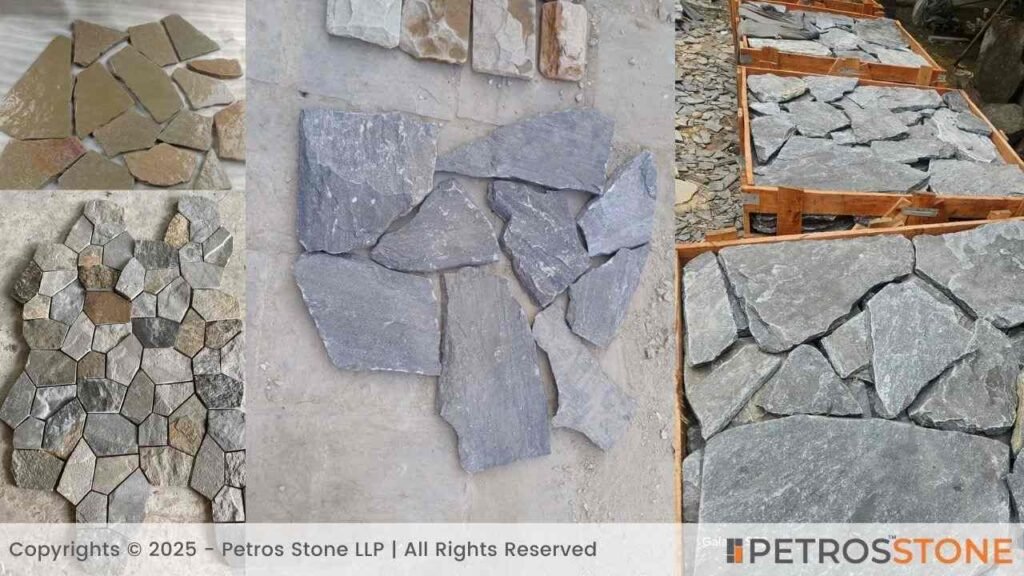
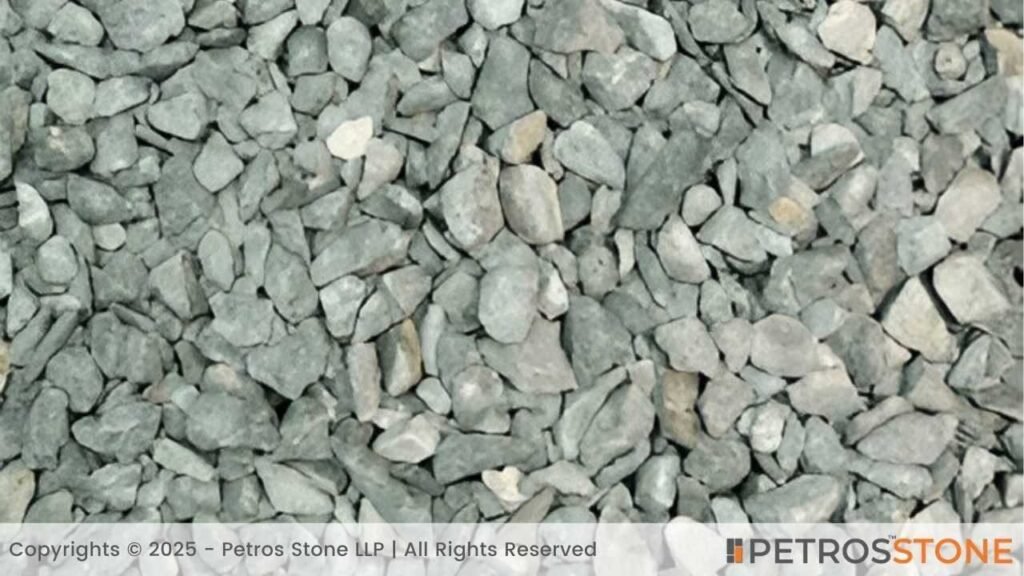
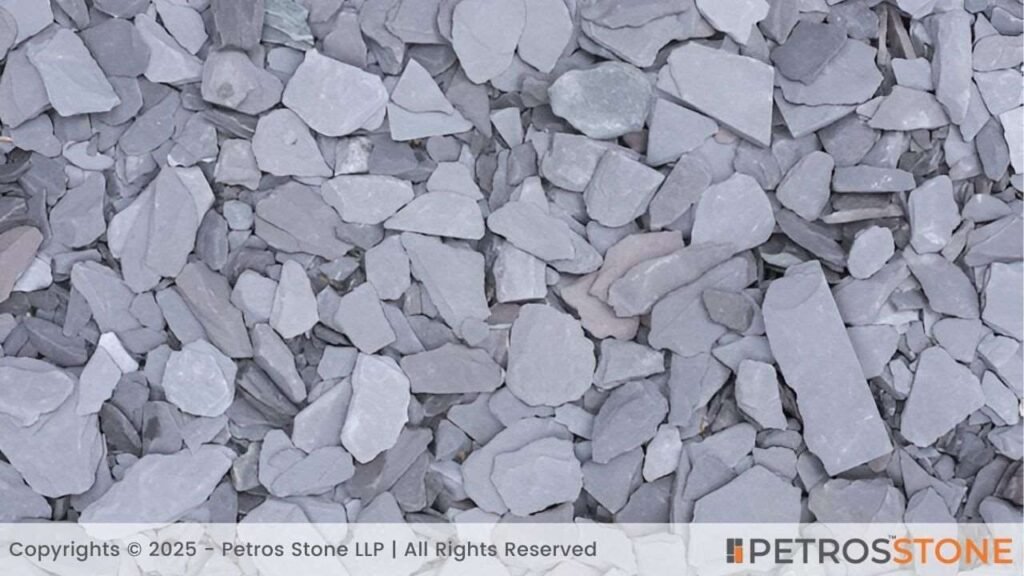
Slate chippings are a brilliant choice for upgrading your outdoor space. These small, flat pieces of natural slate stone bring a clean, stylish look to gardens, driveways, or paths. They’re tough, need little upkeep, and come in shades like blue, grey, plum, or green. Are you lining a pond? Or perhaps mulching a flower bed? Paving a driveway? Slate Chips are your solution, which blend beauty with function.
In this article, we’ll cover what slate chippings are used for, how to install them, easy maintenance tips, and where to find the best bulk deals. Let’s get started!
What Slate Chippings Can Do?
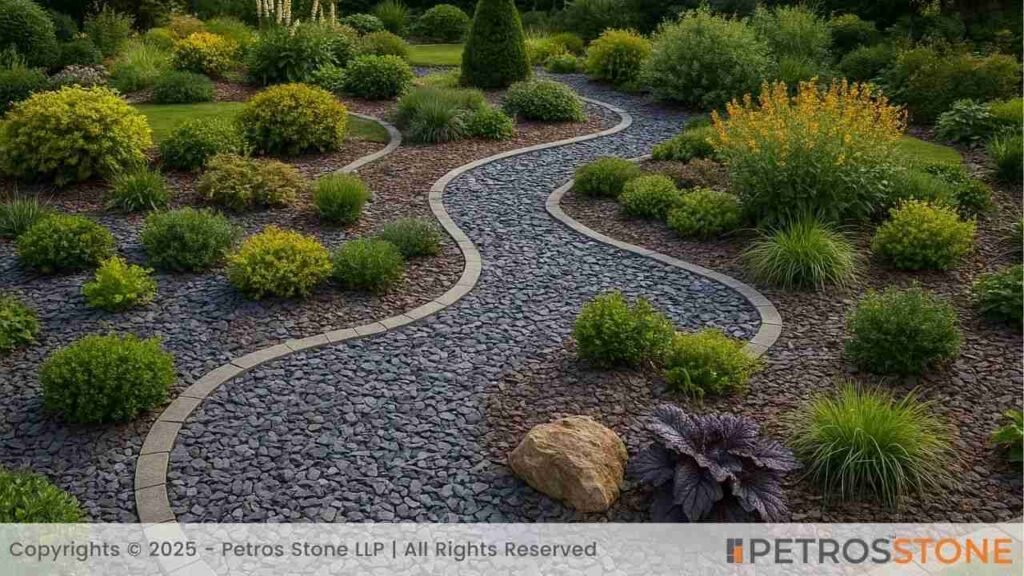
Slate chippings are a go-to choice for sprucing up outdoor areas. Their jagged edges lock together, so they don’t scatter in busy spots like driveways or walkways. The larger 40 mm chippings can even withstand the weight of cars, making them perfect for daily use. They’re also great for filling spaces between patio slabs, giving a modern, weed-free finish.
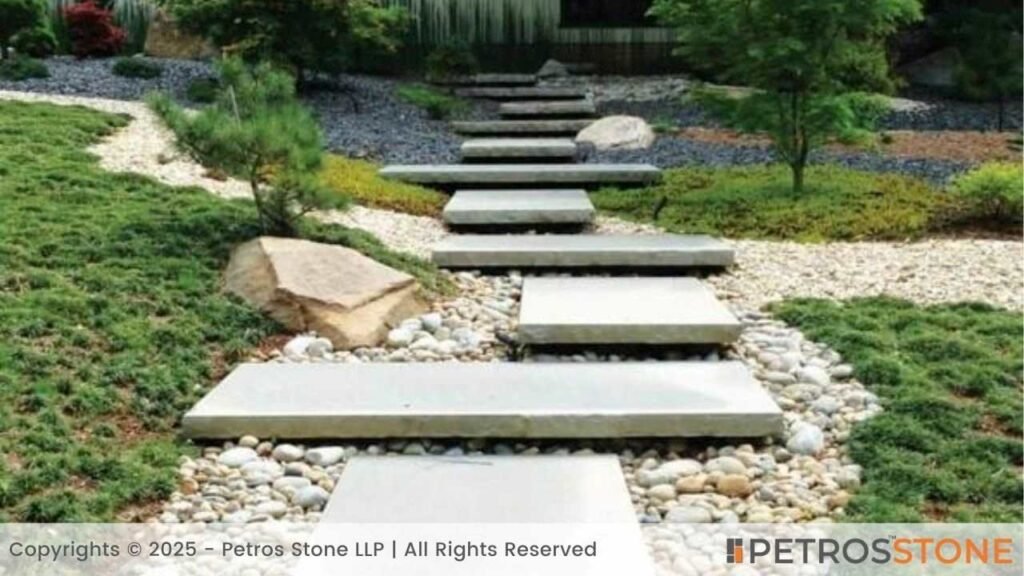
In gardens, they work as mulch for borders, beds, or pots, keeping soil damp and cutting down on watering. They shine in rockeries or around water features, adding a natural texture. With colors that stand out – especially when wet – you can match your yard’s vibe or mix it up for contrast. They’re practical and sharp, no matter the project.
Installing Slate Chippings
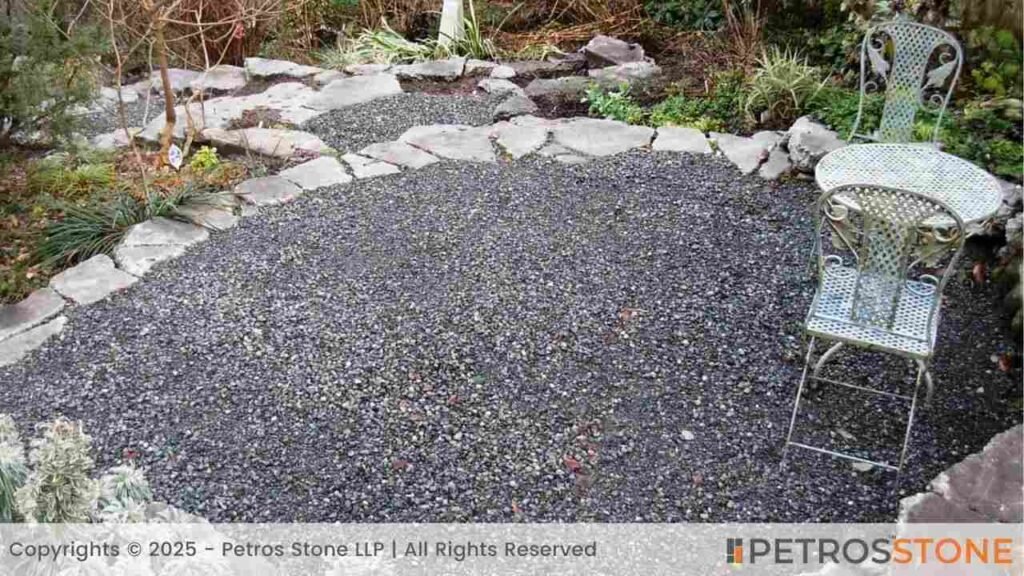
Putting in slate chippings is a simple job if you prep right. Clear the ground, set up a solid base, and spread the chippings evenly. Pros can tackle big projects, but smaller ones like garden paths or borders are perfect for doing yourself. A good, weed-free base keeps them looking great for years.
Can You Install Them Yourself?
You sure can. Smaller jobs like garden beds or paths are easy for most folks with a few tools. Bigger projects, like driveways, might need a compactor or an extra pair of hands, but they’re still within reach if you’re up for it. Take it step by step, and you’ll get a pro-level look without the big cost.
Tools You’ll Need
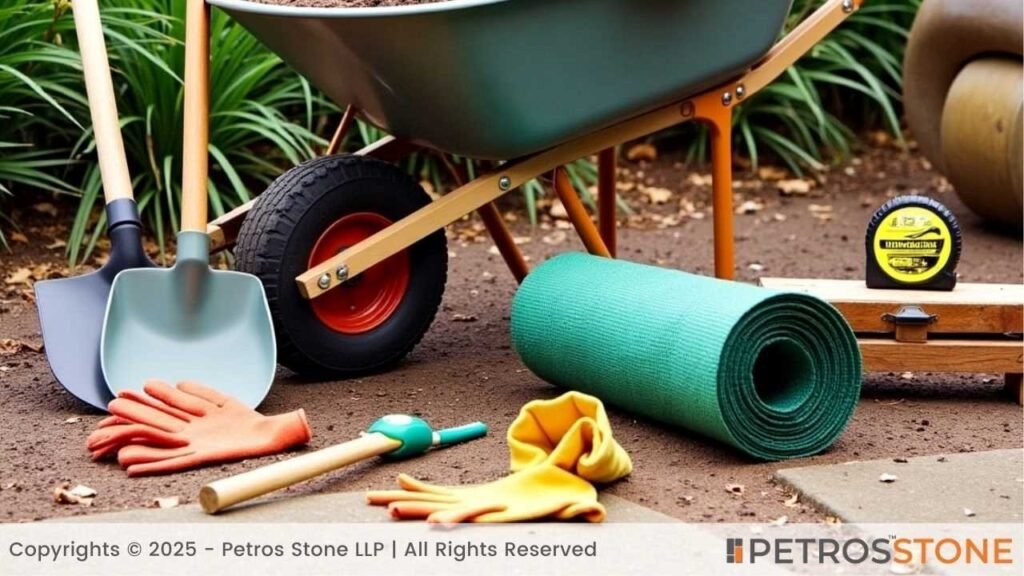
To install slate chippings, grab these tools:
- Rake
- Shovel
- Wheelbarrow
- Roller or compactor
- Measuring tape
- Weed-blocking membrane
- Utility knife
- Gloves and safety gear
These make the job smooth and give a professional result.
Step-by-Step Installation Guide

Here’s how to set up slate chippings for a solid, good-looking result:
1. Clear the Ground
Grab a shovel and clear out grass, weeds, rocks, or junk. Dig up any tough roots to start fresh. For driveways, clear a bit extra around the edges for edging.
2. Smooth It Out
Use a rake to even out the soil. You want a flat base to avoid lumpy spots later. A measuring tape helps make sure it’s level, especially for big areas.
3. Lay a Base Layer
Spread a 4-inch layer of crushed stone or gravel. This gives your chippings a firm base so they don’t sink. For driveways, keep it at least 100mm thick for cars. Use a wheelbarrow to haul and spread it.
4. Pack the Base
Compact the base with a roller or compactor. Go over it a couple of times to make it solid. This keeps things steady. Wear gloves to stay safe.
5. Add a Weed Barrier
Lay a weed-blocking membrane over the base to stop weeds and hold chippings. Cut it to fit, overlapping edges by about 10cm. Tuck the edges under or pin them with stakes. A utility knife makes quick work of cutting.
6. Spread the Chippings
Dump the slate chippings onto the membrane with a shovel. Spread them out evenly, no clumps. Aim for 4 – 5cm deep for paths or borders, 5 – 6cm for driveways. Rake them smooth for a clean layer.
7. Settle Them In
Lightly compact the chippings with a roller to keep them in place. Don’t press too hard – you don’t want to crack the slate. This locks them in for busy areas.
8. Edging
Add metal, plastic, or stone edging to hold the chippings and give a neat finish. Check for uneven spots and fix them with a rake.
9. Final Look
Walk over the area to test it. Add more chippings to thin spots and rake again. For driveways, drive over it to check if it holds up.
These steps give you a sturdy, sharp setup that lasts.
What to Know About Slate Chippings?
Picking the right slate chippings means thinking about size, thickness, and toughness.
Size
Chippings come in different sizes for different jobs:
- Small (1 – 3 mm)
Great for paths or decorative areas. They fit into tight spots and look neat. - Medium (5 – 10 mm)
Good for water features or landscaping where you want some texture. - Large (20 – 40 mm)
Best for driveways or borders. They’re stable and handle heavy use.
Thickness
Most chippings are 5 – 10 mm thick. This makes them tough enough for weather and traffic without moving. Thicker ones are great for driveways or paths.
Toughness
Slate chippings are built to last. They stand up to rain, sun, or frost without breaking down. Their smooth texture keeps them in place, even in windy conditions, so your project stays sharp.
How Much Does a Ton Cover?
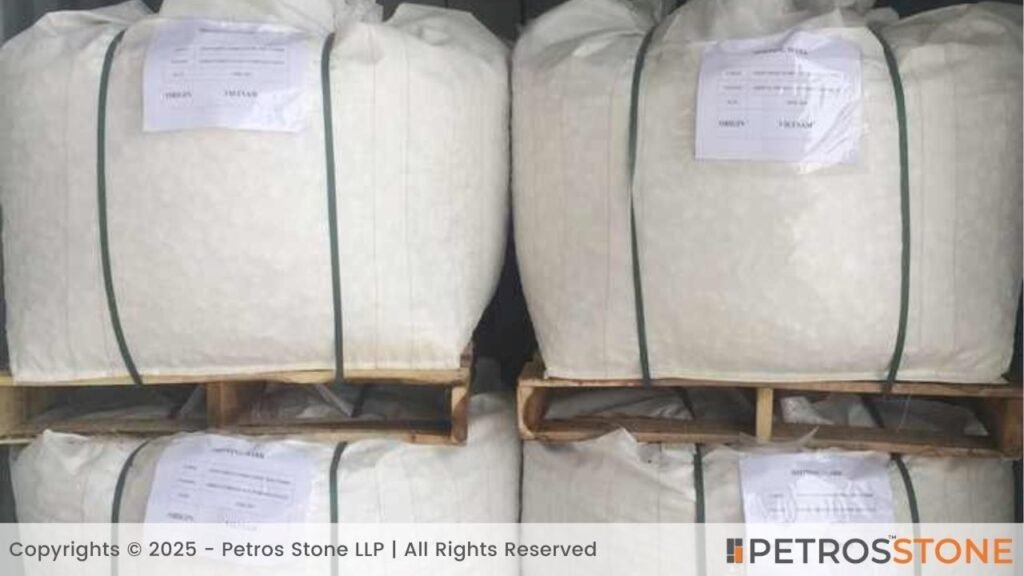
A ton of slate chippings covers about 9 – 12 square meters at a 50mm depth. Smaller 20mm chippings cover a bit more, while bigger 40mm ones cover less since they’re chunkier. An 800kg bulk bag covers roughly 8 – 10m² at 40mm, and a 1000kg bag covers up to 12m² at 50mm. Grab 10 – 15% extra to cover settling or tweaks. Suppliers often have calculators online – just plug in your area’s size and depth.
How Deep Should They Be?
Depth depends on what you’re doing. For 20mm chippings, 4 – 5cm is good for paths or decorative spots. For 40mm chippings, go 5 – 6cm, especially on driveways, to handle heavy use. Bigger paddlestones (50 – 100mm) need at least 6cm for rockeries or water features. Too thin, and they’ll shift or show the membrane; too thick, and you’re spending extra. Driveways need 50 – 60mm over a solid base to avoid ruts. Use a weed barrier and compacted base every time.
Keeping Slate Chippings Looking Good


Slate chippings don’t need much work, but a little care keeps them fresh. Here’s how to maintain them:
1. Check Them Often
Every few months, look for thin or uneven spots, especially after rain or heavy use. Add fresh chippings to fill gaps. Swap out any cracked stones.
2. Clear Weeds and Moss
Weeds or moss can pop up, even with a membrane. Pull them out by hand or use a weed killer to keep things tidy. Catch them quickly to avoid a mess.
3. Clean the Chippings
Dirt or stains can dull the shine. Scoop chippings into a wheelbarrow with holes drilled in the bottom and power wash them. The water drains, leaving clean slate to put back. For small spots, a hose and brush work fine.
4. Refresh the Color
Sun and rain can fade the chippings over time. Sprinkle a thin layer of new slate to bring back the vibrancy without redoing it all.
5. Keep the Shape
If the chippings shift, rake them back into place for a neat look. This is key for paths or borders where looks matter.
6. Check the Edging
Look at the edging for damage or looseness. Fix it to keep the chippings in place and the design clean.
7. Fix Any Issues
For ruts or holes, especially in driveways, add fresh chippings and compact them. If the base shifts, lift the slate, level the base, and re-lay it.
These quick jobs keep your chippings looking sharp with little effort.
Why Slate Chippings Are Great?
Slate chippings bring a ton of value to any outdoor project. Here’s why they’re a smart choice:
Budget-Friendly
They cost way less than fancy paving or concrete but still give your space a high-end feel. You get a polished look without breaking the bank. They’re a great pick for anyone watching their wallet. Plus, their long lifespan means fewer replacements.
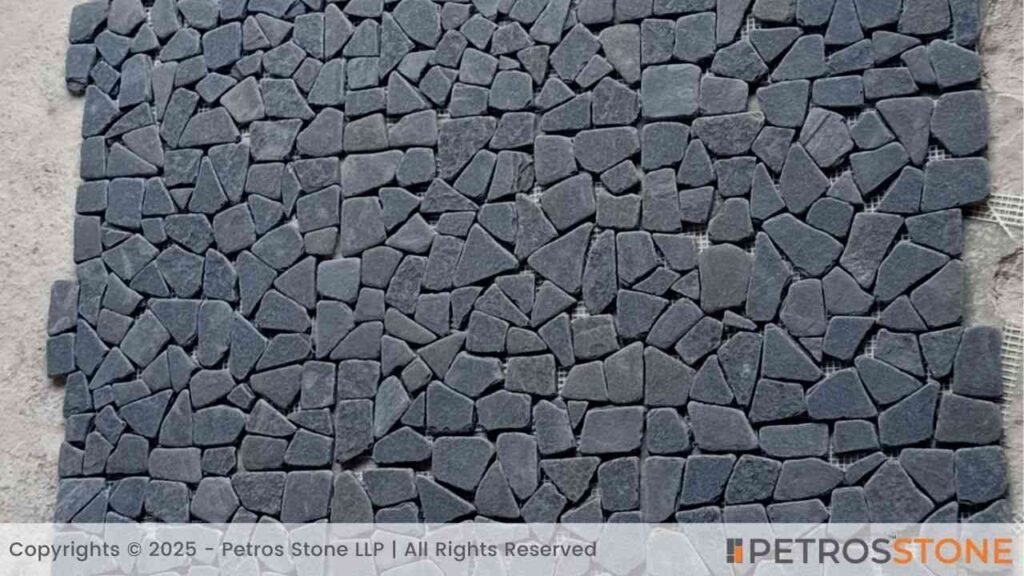
Sharp Look
Their bright colors – like blue, plum, or grey – add a modern vibe to gardens, paths, or driveways. They shine even more when wet, catching the eye. The natural texture blends with any style. They make your outdoor space stand out effortlessly.
Easy to Put In
Laying them is simpler than wrestling with tarmac or heavy tiles. They’re perfect for DIY projects, even if you’re not a pro. With basic tools, you can get a great result fast. It’s a project most folks can tackle in a weekend.
Built to Last
Slate chippings stand up to rough weather – rain, sun, or frost – without breaking down. They stay put even in windy conditions, keeping your design intact. Their toughness means they look good year after year. You won’t need to redo them often.
Low Upkeep
A quick rake or a top-up now and then keeps them fresh. They don’t demand much time or effort to stay sharp. This makes them ideal for busy homeowners. A little care goes a long way with slate.
Weed Control
Pair them with a weed-blocking membrane, and they stop weeds from popping up. This saves you hours of gardening work. Your borders and paths stay clean with minimal effort. It’s a practical way to keep your yard tidy.
Versatile
They work for everything – driveways, mulch, rockeries, or water features. With different sizes and colors, you can match any style or create bold contrasts. They’re flexible enough for any project. From small paths to big driveways, they fit right in.
Eco-Friendly
Many slate chippings come from recycled slate roofing, making them a green choice. You’re helping the planet while upgrading your
Where to Buy in Bulk?
To save money, buy slate chippings in bulk from the source. Petros Stone offers top-notch slate chippings at great prices, with direct import options.

Slate chippings are an easy way to add style and function to your yard. With a bit of care and proper setup, they’ll keep your space looking fresh for years.
Frequently Asked Questions
What are slate chippings good for?
They’re great for driveways, paths, borders, rockeries, water features, or mulch. They add style, stop weeds, and help plants stay moist.
What size is best for driveways?
Use 30 – 40mm chippings. They’re sturdy and handle cars well.
What size works for paths?
Medium 20mm chippings give a smooth, good-looking walking surface.
How much does a bulk bag cover?
An 800 kg bag covers 8 – 10m² at 40mm depth; a 1000 kg bag covers up to 12m² at 50mm. Use a calculator for exact numbers.
What goes under slate chippings?
Use a weed membrane, landscaping fabric, or crushed stone base to stop weeds and keep things steady.
How do I clean them?
Power wash in a container with holes or use a hose and brush for small areas to clear dirt or moss.
Are they eco-friendly?
Yes, many are recycled from slate roofing, making them a green choice.
Summary
Slate chippings are a smart and stylish choice for enhancing gardens, driveways, and landscaping projects. This guide explains everything from their uses and benefits to step-by-step installation and maintenance tips. Whether you’re laying a new path or refreshing flower beds, slate chips are durable, low-maintenance, and perfect for DIYers. You’ll also learn how much coverage you get per ton, how deep to lay them, and where to buy in bulk for the best deals.
Key Takeaways
- Versatile Use: Ideal for driveways, pathways, borders, ponds, and as decorative mulch.
- Easy DIY Installation: Requires only basic tools, a solid base, and weed barrier for long-lasting results.
- Coverage Guide: A 1000 kg bulk bag can cover up to 12 m² at 50 mm depth.
- Low Maintenance: Occasional raking, weed removal, and a light top-up keep them looking fresh.
- Stylish and Durable: Available in colors like blue, plum, and green—great curb appeal with minimal upkeep.
- Bulk Deals Available: Petros Stone and other suppliers offer direct pricing and delivery options for large orders.
Feel free to get in touch for a free consultation, quote, and get a detailed understanding from our experts here at Petros®. Visit https://petrosstone.com/ or call +91-8446360361 and WhatsApp

Hi, I’m Shivangi,
With years of experience in the architecture and design space, I write to bridge the gap between material knowledge and practical application. At Petros® Stone, I create content that highlights the beauty, function, and impact of natural stones, helping homeowners and professionals make confident design decisions.
Explore my LinkedIn profile to learn more about my work!

Brown Granite

White Galaxy Granite

Blue Bahia Granite
Silver Cloud Granite
Black Pearl Granite
Dallas White Granite
