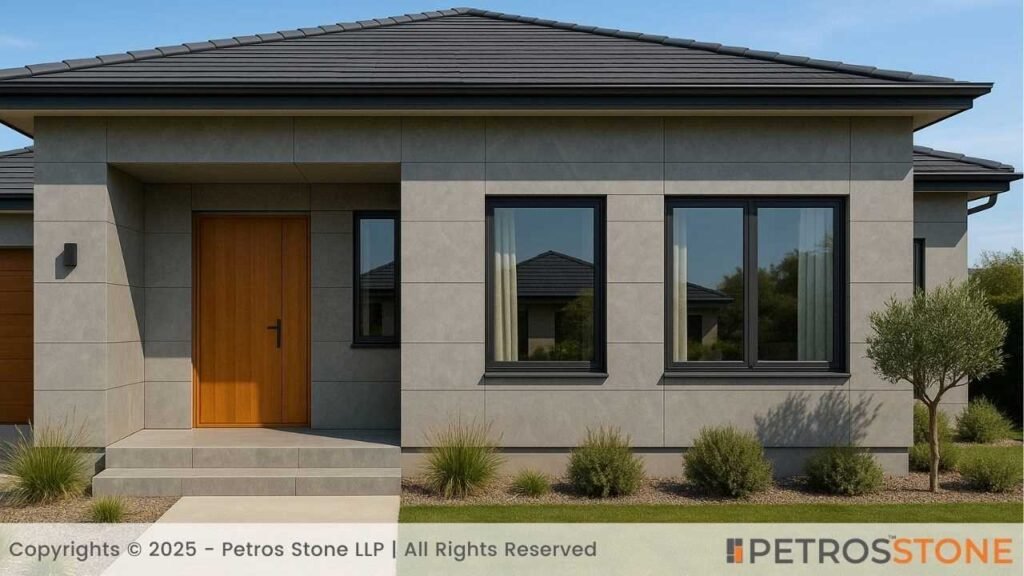
When it comes to building a façade, there’s no room for compromise as elevations are the impression-makers. Owing to the importance of façades, designers often opt for traditional stone cladding.
In this article, we will delve deep into the application of sintered stone in exterior cladding, how to install it, and unveil where not to opt for this material.
While stones offer a timeless appeal, they often come with maintenance challenges. That’s where sintered stones step in. This innovative material is born from natural minerals, quartz, and silica subjected to extreme pressure and heat. Replicating the visual appeal of natural stone, this innovative stone boasts exceptional durability and unparalleled aesthetics.
- Why Pick Sintered Stone Cladding?
- Where to Use Sintered Stone?
- Where Not to Use Sintered Stone
- Approach to Install Sintered Stone
- Dry Cladding
- Wet Cladding
- Recommended Sizes of Sintered Stone for Façade
- Table for Sintered Stone Sizes/Thicknesses.
- Table for Sintered Stone Typical Sizes
- Types of Sintered Stone and Design Ideas
- 1. Onyx-Look
- 2. Terrazzo Style
- 3. Carrara Marble-Look
- 4. Metal Finish
- 5. Sandstone Look
- 6. Ultra-thin Veined Design
- 7. Travertine-Look
- 8. Concrete or Industrial Finish
- 9. Wood-Grain Finish
- Expert Tips to Keep in Mind for Flawless Cladding
- Why Does Professional Consultation Matter?
- Set a Standard with Sintered Stone
- Summary
- Key Takeaways
Why Pick Sintered Stone Cladding?
Sintered stone has become a popular choice for both interiors and exteriors of residential and commercial buildings. Here are the standout advantages that position these innovative stone façades as a top choice in the new-age architecture:
Versatility in Design
This material comes in a range of tones, patterns, and finishes, allowing for a versatile design. Exterior cladding in sintered stone offers amped up aesthetics and complements any architectural language.
Durability for Longevity
Being an engineered product, this stone is exceptionally durable, resistant to stains and scratches, making it an ideal choice for elevation.
Minimal Maintenance, Fresh Appeal
Sintered stone façades demand minimal maintenance, unlike natural stone cladding. Owing to its non-porous properties, it sustains even in extreme weather.
Fire and Heat Resistance
Being fire and heat-resistant, this material is a safe choice for cladding.
An Eco-Conscious Choice
Built from natural raw materials, this stone is inherently sustainable as it’s free from synthetic binders and is a completely recyclable product.
Where to Use Sintered Stone?
Here are the ideal applications of this stone:
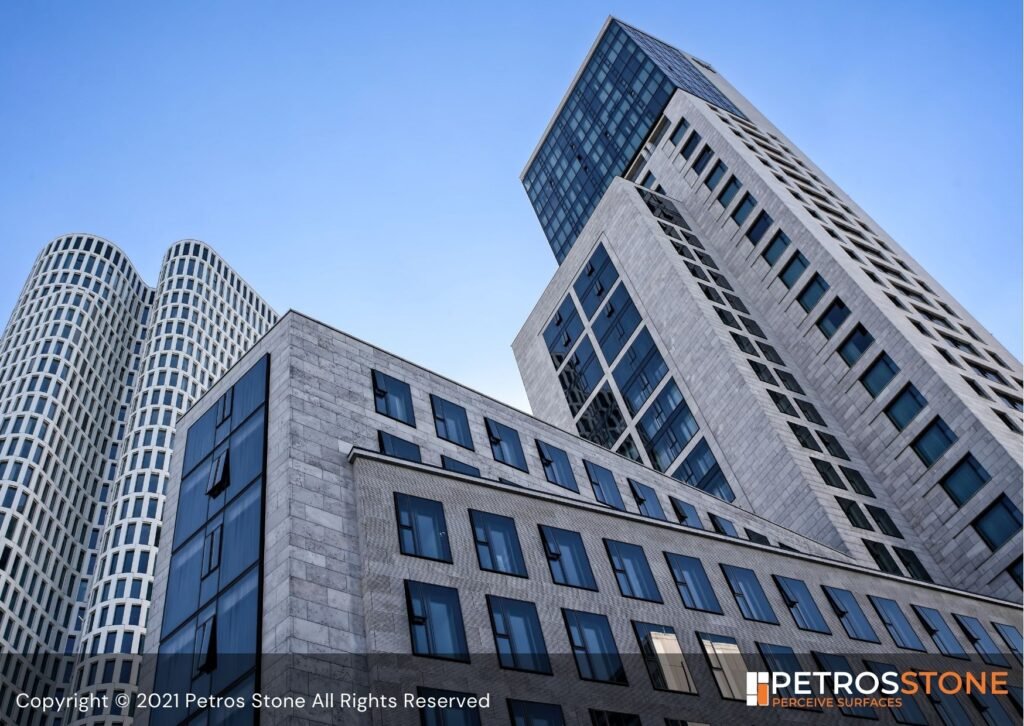
High-end Exterior Cladding
Sintered stone cladding is ideal for buildings facing extreme temperature variations, from intense sunlight to high moisture. Its non-porous nature ensures exceptional durability while adding a sophisticated touch to the design.
Experimental Façade
With designs ranging from white veined slabs to eclectic black stone, this engineered stone offers versatility and supports bold design languages. With a variety of colors and patterns to pick from, it encourages creative experimentation in design.
Energy-Efficient Structures
With sustainability being the need of the hour in the design and construction industry, this engineered stone stands out as a responsible choice. Being 100% recyclable and free from synthetic binders, it aligns well with the principles of sustainable building.
Hygiene-Conscious Surfaces
The non-porosity of this stone makes it ideal for both exteriors and interiors. Its hygienic nature makes it particularly suitable for applications such as kitchen countertops, bathroom vanities, and more.
Where Not to Use Sintered Stone
While sintered stone is a remarkably versatile and durable surface, it isn’t the perfect fit for every scenario. Here are the conditions where you may consider avoiding its application:
Low-budget Projects
If you’re working with a tight budget, a sintered stone façade might not be the most feasible option. Its installation cost is generally higher than conventional cladding materials. While its durability and low maintenance can offer savings over time, the upfront expense may strain the project budget.
DIY Project
Sintered stone installation demands skilled labor. If you’re planning a DIY project, don’t opt for this stone as it demands professional skills in order to cut and install the slabs.
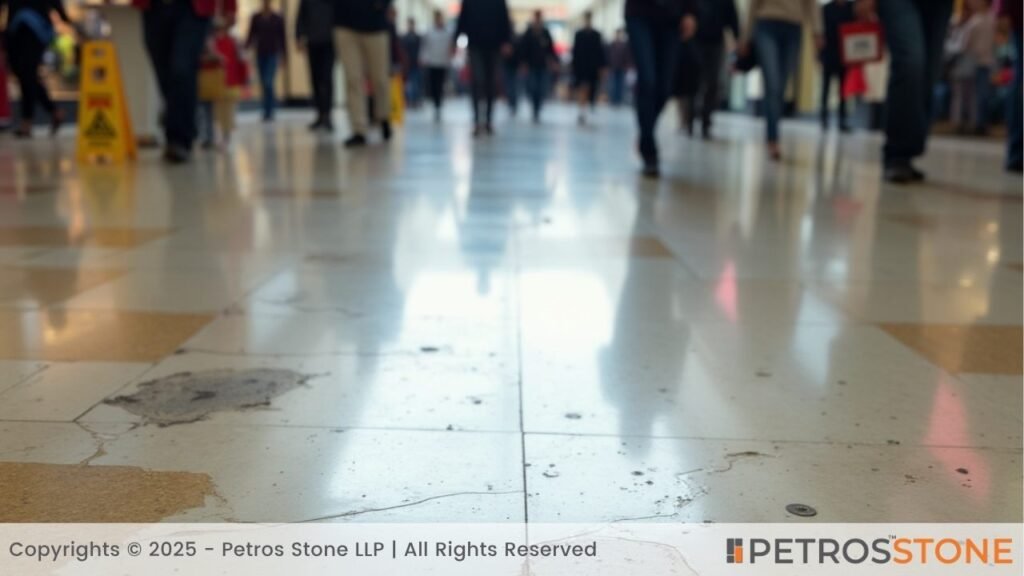
High-Traffic Areas
While this stone is durable, consider avoiding its application in high-traffic zones, as sharp and heavy items may lead to cracking or chipping of the stone.
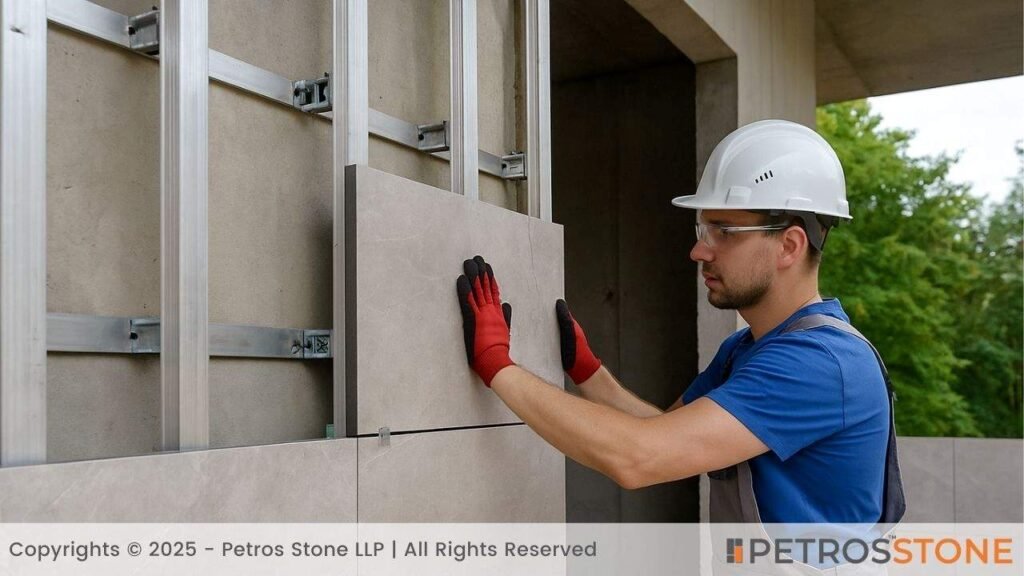
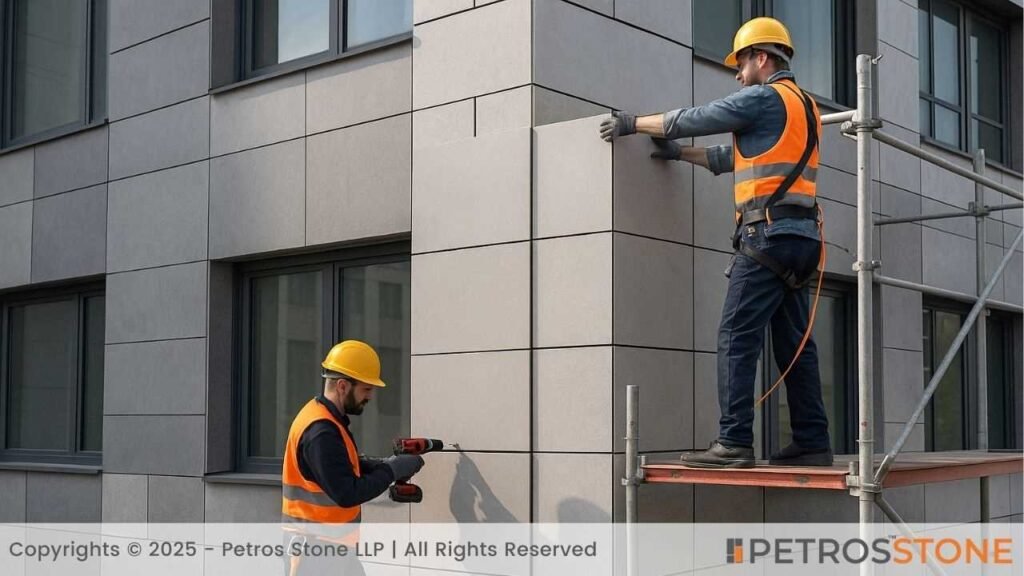
Approach to Install Sintered Stone
Sintered stone installation has two major approaches for a seamless and durable execution.
Dry Cladding
This method works with developing a sub-frame structure, typically in galvanized steel, hidden clips, or aluminum.. As the stone is fixed on the frame, it offers the flexibility of developing a ventilated façade owing to the air gaps formed behind.
Steps for Installation with Dry Cladding
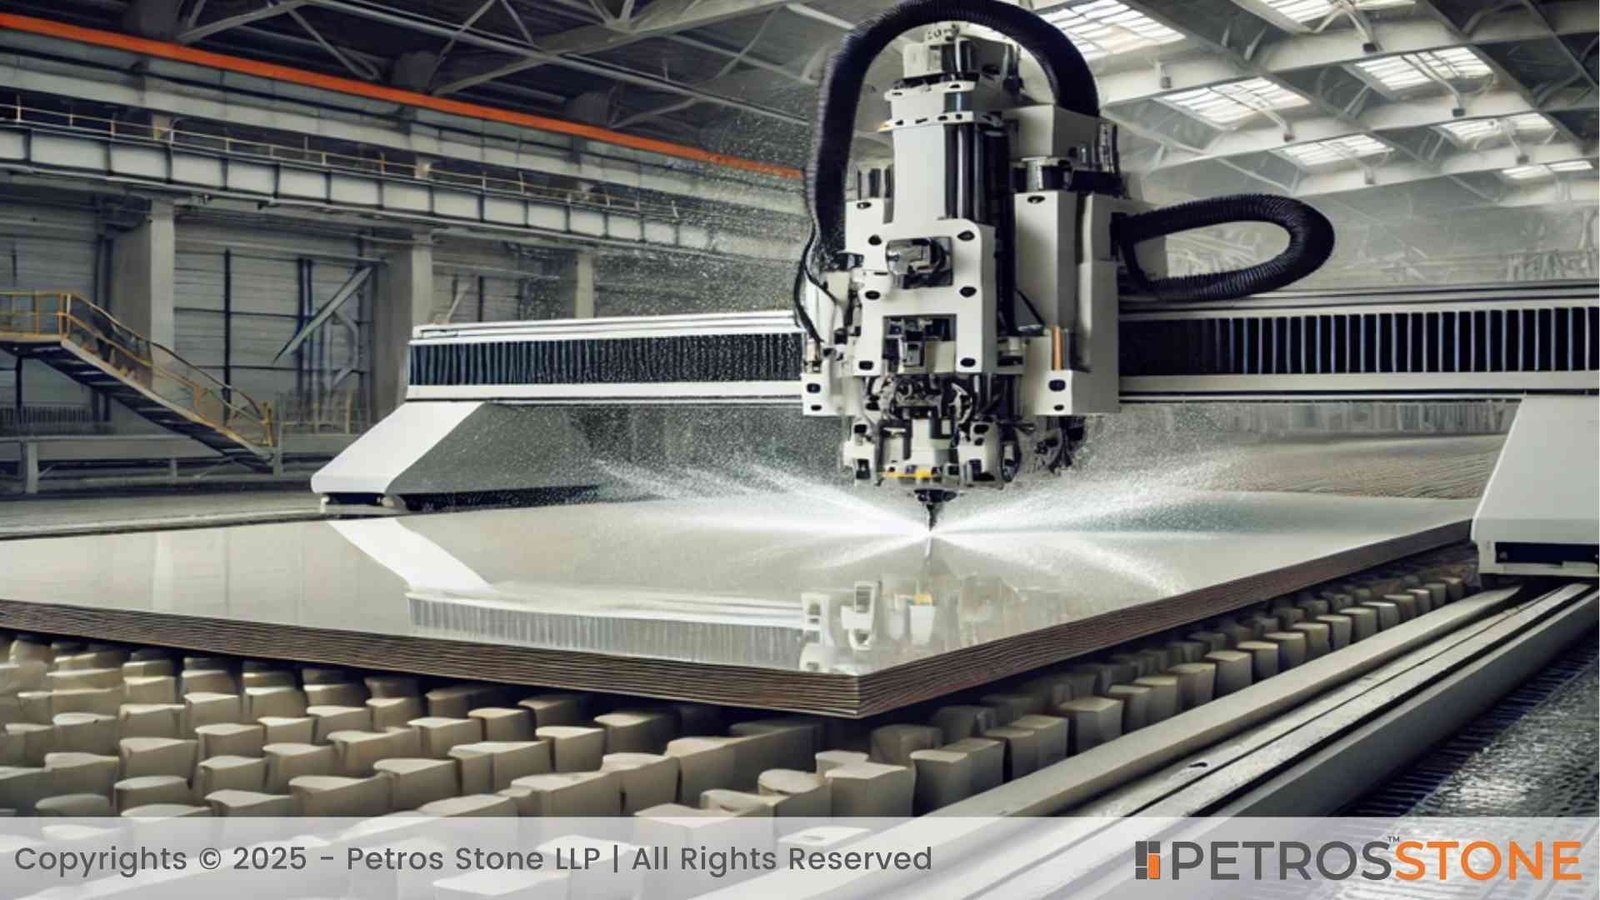
- Analyze the elevation design and cut the stone precisely per measurements.
- Prepare the back framing in aluminum or galvanized steel according to the slab sizes. Evaluate the frame thickness based on the stone thickness, slab sizes, weight, and wind load to ensure durability. Anchor the frame to the wall using a sturdy anchoring system.
- Once the substructure, i.e., the back framing, is in place, start fixing the stone on it with mechanical fasteners like anchors, bolts, clips, and screws.
- The spacing between metal frames is determined by the load calculation and the size of stone panels.
- Make sure to seal the joints using sealant to prevent water seepage and to amp up the overall visual appeal of the façade.
Perks of Dry Cladding
One of the benefits of sintered stone installation using dry cladding is the ventilated façades as a result of the air gaps formed with the back-framing. Here are the advantages of the dry cladding method:
- Although this stone is non-porous, however, dry cladding offers another protection layer owing to the gap formed between the cladding and building. It helps minimize water impermeability and protects the building structure.
- The air cavity prevents overheating of the building during the summer by serving as an insulation barrier.
- Dry cladding results from different layers between the building and the cladding. It helps in noise absorption and keeps the building acoustically insulated.
When Not to Use Dry Cladding
- As dry cladding involves building a sub-structure, it’s not recommended for projects on a tight timeline.
- Dry cladding method for sintered stone demands skilled labor and specialized tools for precision in finishing, which often leads to higher cost. It can be avoided for projects with constrained budgets.
Wet Cladding
The wet cladding method involves stone fixing with the help of high-quality adhesives. In this case, the stone slabs are directly attached to the building, eliminating any air gaps. Wet cladding is comparatively faster than the dry cladding system.
Steps for Installation with Wet Cladding
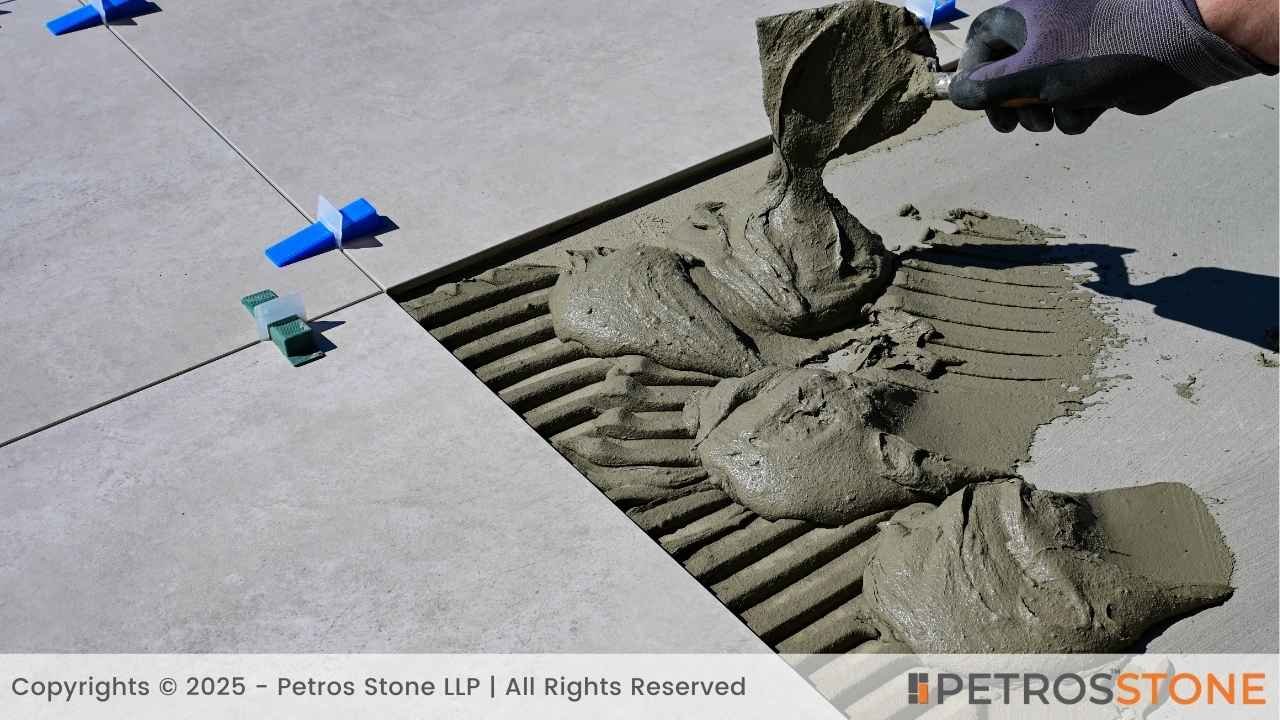
- Start the installation by preparing the sub-base first. Make sure that the cladding wall is clean and dry. Level the wall precisely to remove any undulations.
- Measure the stone slab sizes required and precisely cut to size.
- Apply high-performance adhesives to the back of the stone slab and press the panels firmly onto the wall. Make sure to maintain the alignment and leveling for a neat finish.
- Once the stone is in place per design, seal the seams or joints with sealant for a uniform surface.
When to Use Wet Cladding
- Wet cladding is one of the preferred methods for interior walls and low-rise structures.
- This cladding technique suits designs demanding a neat and flush look.
- As fixing sintered stone with adhesives is quicker than dry cladding, it’s recommended for projects with a tight timeline.
When Not to Use Wet Cladding
- Wet cladding is often not suggested for high-rise structures owing to the structural stress.
- This cladding method is not preferred for buildings that demand frequent retrofitting or maintenance, as replacing panels without damaging the adjacent panel is challenging in this case.
Recommended Sizes of Sintered Stone for Façade
Table for Sintered Stone Sizes/Thicknesses.
| Stone Slab Size (in cm) | Thickness (in mm) |
| 80 x 240 | 15 mm |
| 80 x 240 | 12 mm |
| 80 x 300 | 15 mm |
| 80 x 300 | 12 mm |
| 80 x 320 | 15 mm |
| 80 x 320 | 12 mm |
| 120 x 240 | 15 mm |
| 120 x 240 | 12 mm |
| 160 X 320 | 15mm |
| 160 X 320 | 12 mm |
Table for Sintered Stone Typical Sizes
| Size | Image | Thickness | Size in cm |
| Standard |  | 15 mm | 80 x 320 |
| Medium |  | 15 mm | 120 x 320 |
| Large |  | 20 mm | 160 x 320 |
This stone is also available in 6 mm and 12 mm thicknesses. When it comes to the stone installation on the exterior façade, 6 mm and 12 mm thick panels are recommended owing to their lightweight and, hence, ease of installation.
Thicker slabs with a thickness ranging from 12-20 mm are often used for heavy-duty applications like countertops.
Large Panels vs Small Panels
Picking the right panel size is crucial both in terms of practicality and aesthetics. While large slabs deliver a monolithic look, smaller modules are easier to handle and install.
When it comes to a large sintered stone panel, it offers the advantage of minimizing joints and enhancing modern aesthetics. Large panel cladding is well-suited for hospitality, corporate, and premium residential structures.
On the other hand, a small panel is easier to install. It minimizes the risk of breakage and offers flexibility in design, as varying sizes can be installed with grouting to attain the desired look. Small panels work well in traditional buildings and budget-sensitive projects.
Types of Sintered Stone and Design Ideas
Sintered stone cladding offers creative experimentation with designs with its versatile range of colors, textures, and patterns. Let’s go through the top sintered stone designs and their features:
1. Onyx-Look
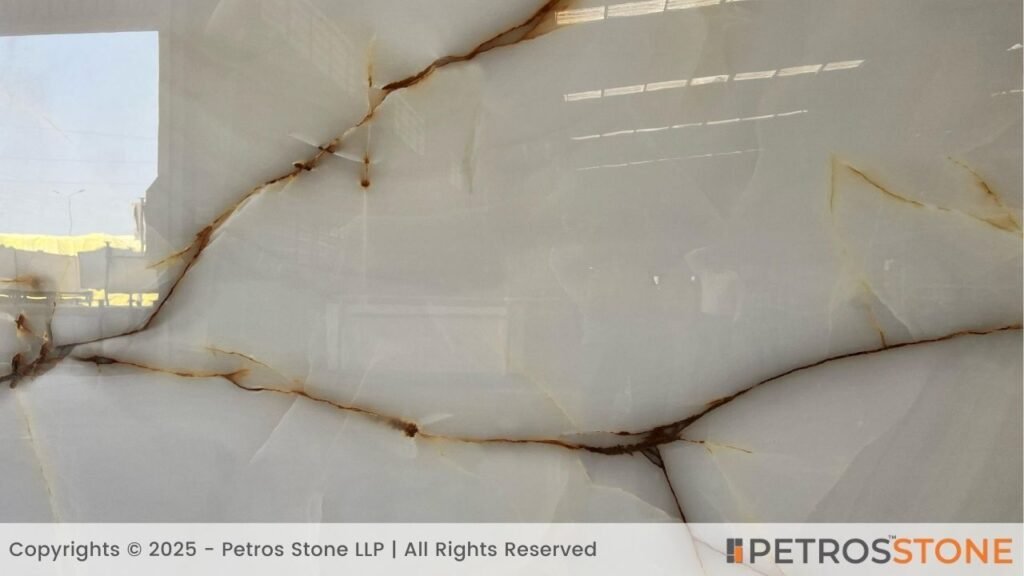
In modern design aesthetics, onyx is considered one of the most premium surfaces with its translucent properties. Onyx series in sintered stone mimics the charm with polished finish and hues including creamy white, beige, red, green, black, and yellow.
This stone is perfect for backlit feature walls, islands, and decorative accents in the exterior cladding.
2. Terrazzo Style
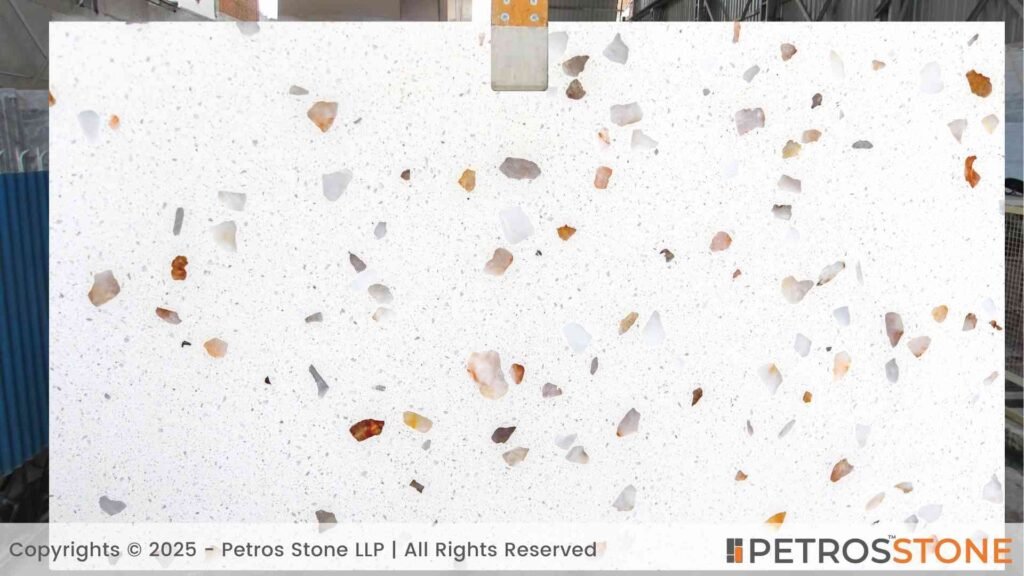
Terrazzo is one of the classic flooring and cladding materials. The sintered stone in terrazzo adds a playful character to a space through its colors and the mix of marble, quartz, granite, and glass chips.
Apart from the countertops and flooring, you can use terrazzo cladding for the feature walls or backsplashes to impart a classic touch to the design.
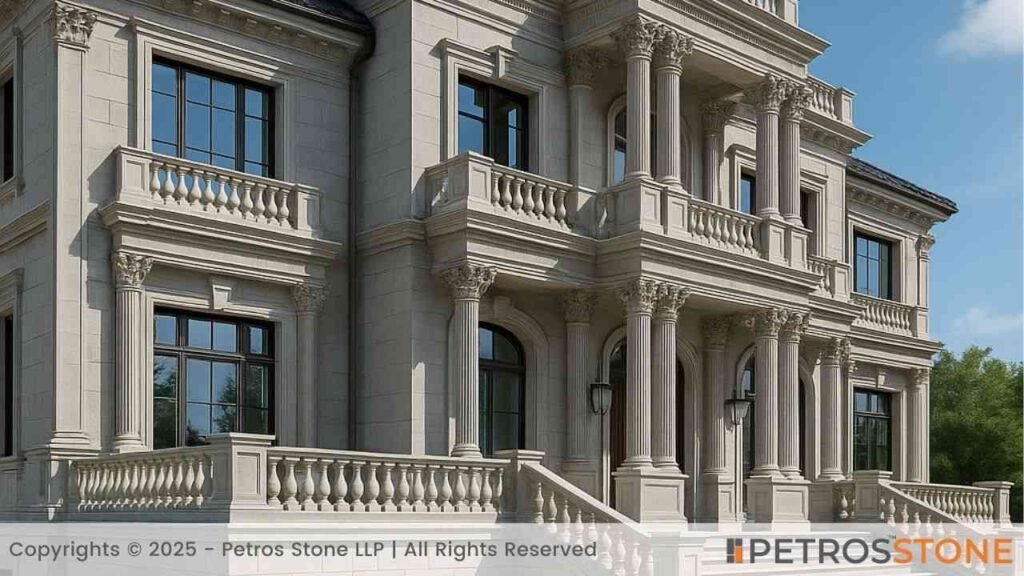
3. Carrara Marble-Look
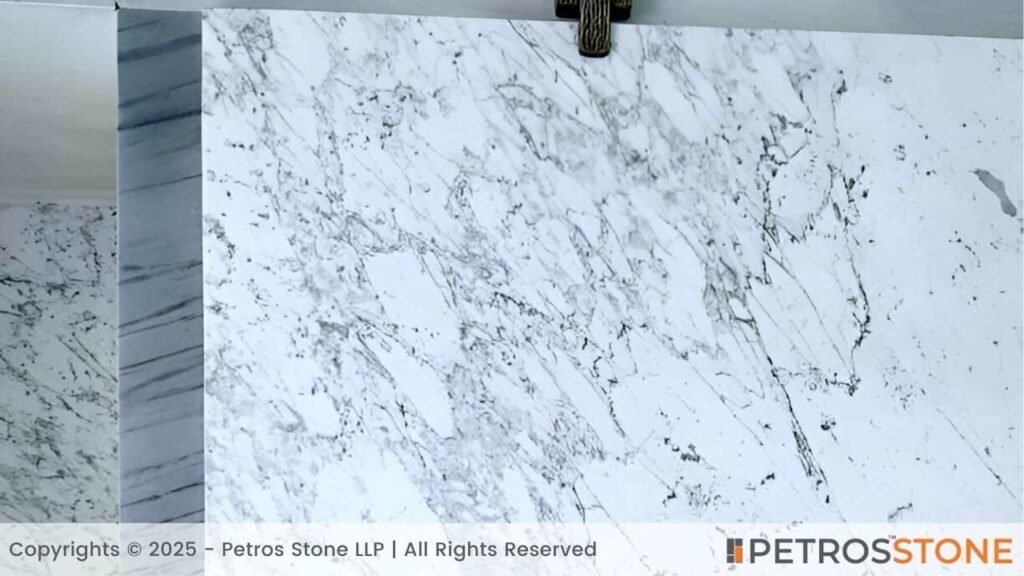
This stone replicates the timeless elegance of Carrara marble. The white base flaunts subtle veining. It is ideal to complement both warm and cool palettes. One of the advantages of using stone over the original marble is that the sintered stone doesn’t require sealing. Calacatta Gold-Look
Resembling the charm of Calacutta marble, this stone exhibits a white base with veining in a golden-brown tone. This stone slab offers versatile applications owing to its range of thicknesses, comprising 3 mm, 6 mm, 12 mm, 15 mm, and 20 mm. When it comes to wall cladding, a 6mm thick slab works well to impart a premium look to the building.
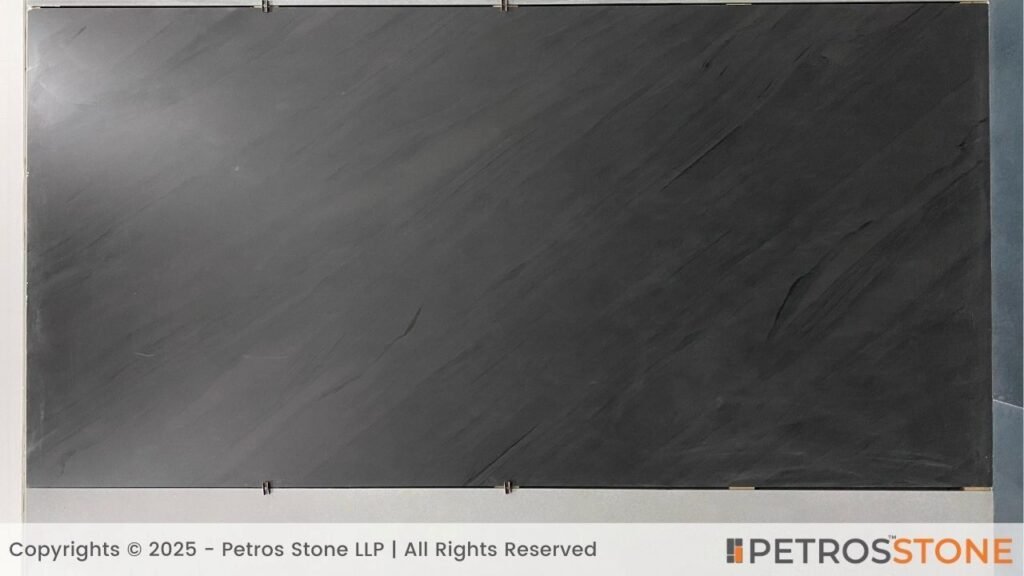
4. Metal Finish
A metal look in stone? Yes, that’s right.
Sintered stone in a metal finish imparts an industrial look to the design with its patina effect and subtle textures. This design complements minimal and modern design aesthetics with its rugged look.
With colors ranging from copper to steel blue, it’s ideal to make a unique style statement, either with matte or reflective surfaces.
5. Sandstone Look
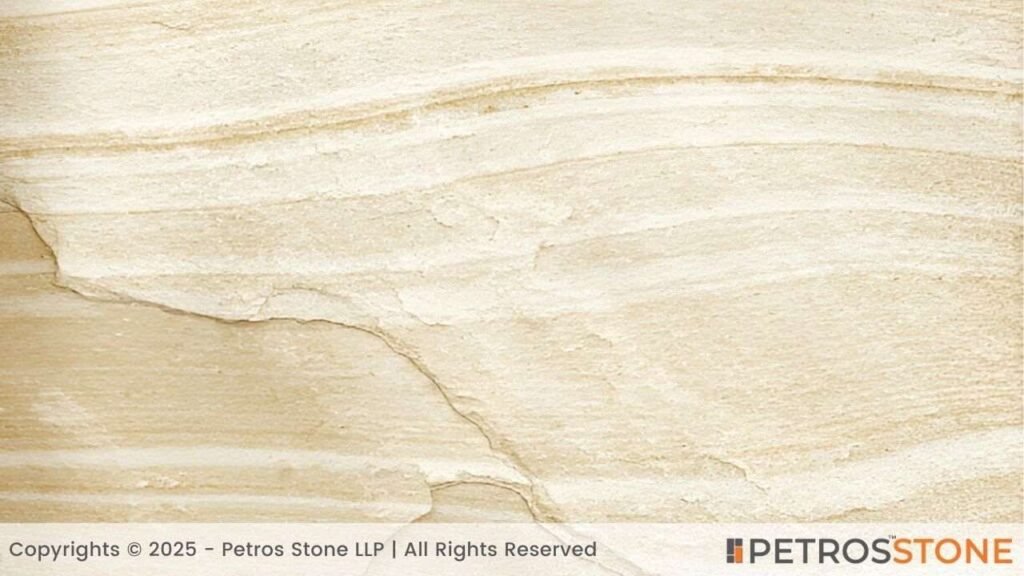
Nothing compares to the earthy touch and sense of warmth a sandstone adds to the design, except for sandstone-looking sintered stone panels.
The iconic golden-beige hues exhibit gentle grains and a natural gradient to resemble the texture and aesthetics of original sandstone. With the stone being non-porous, unlike sandstone, it is an ideal choice for sophisticated exteriors and does not demand high maintenance.
6. Ultra-thin Veined Design

As the name suggests, this stone exhibits delicate veins throughout the surface. This stone is available in tones ranging from white, beige, to soft grays and with both glossy and matte finishes.
Owing to the non-porous properties and UV resistance, this veined stone is an ideal choice for backsplashes and wall panelings.
7. Travertine-Look
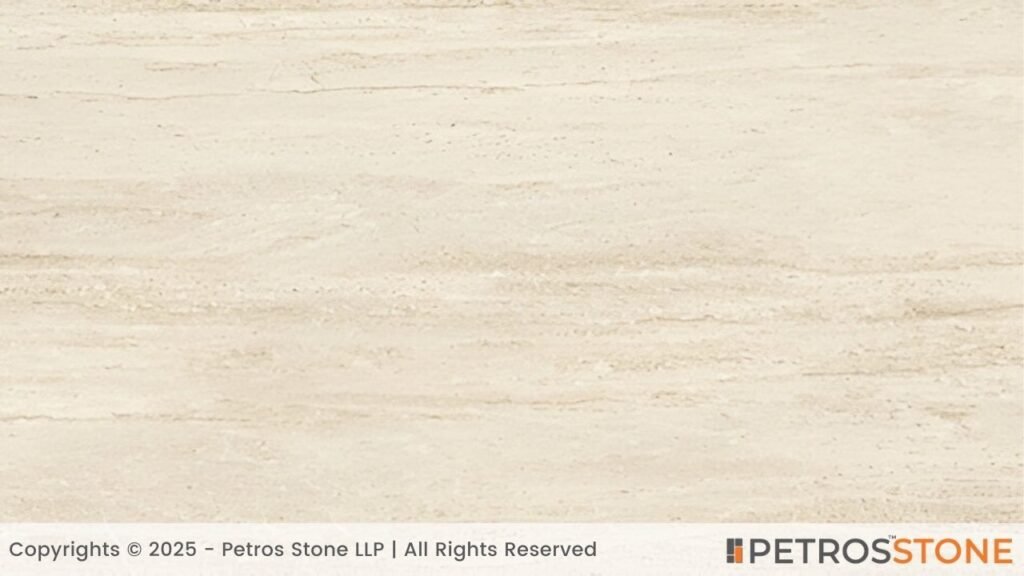
Travertine is one of the most admired stones, yet it poses challenges owing to its porous nature and maintenance demands. This is where travertine-resembling sintered stone stands out.
The sophisticated beige and cream appearance adds a sense of timelessness to the space. You can use this stone in honed or matte finish, based on your design language. Its durability and high UV-resistance make it ideal for exterior cladding for an elegant look.
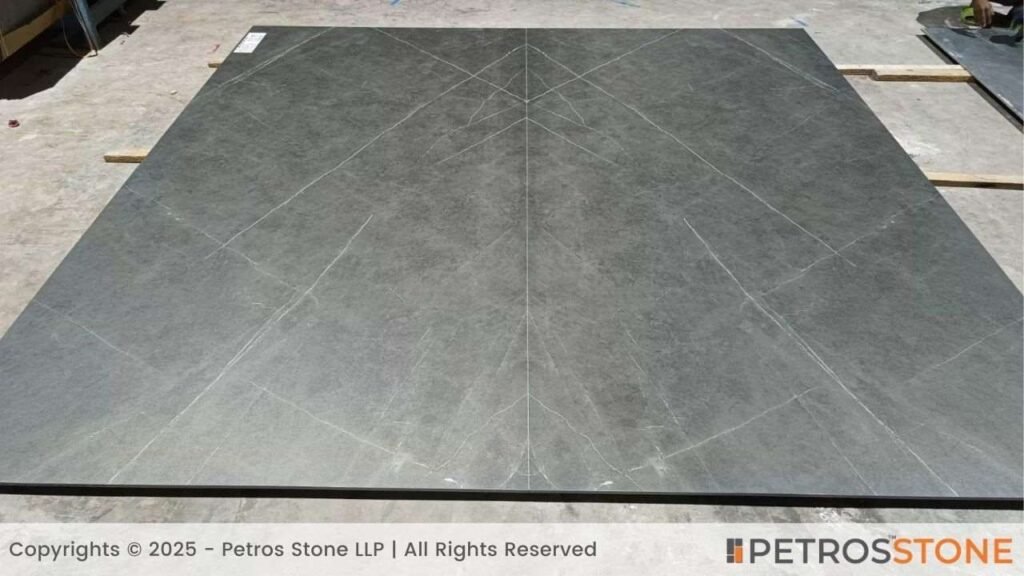
8. Concrete or Industrial Finish
Do you like the rustic look concrete imparts? Go for the textured sintered stone replicating the look and feel of concrete surfaces. The gray color palette makes it ideal for structures with industrial or contemporary aesthetics.
9. Wood-Grain Finish
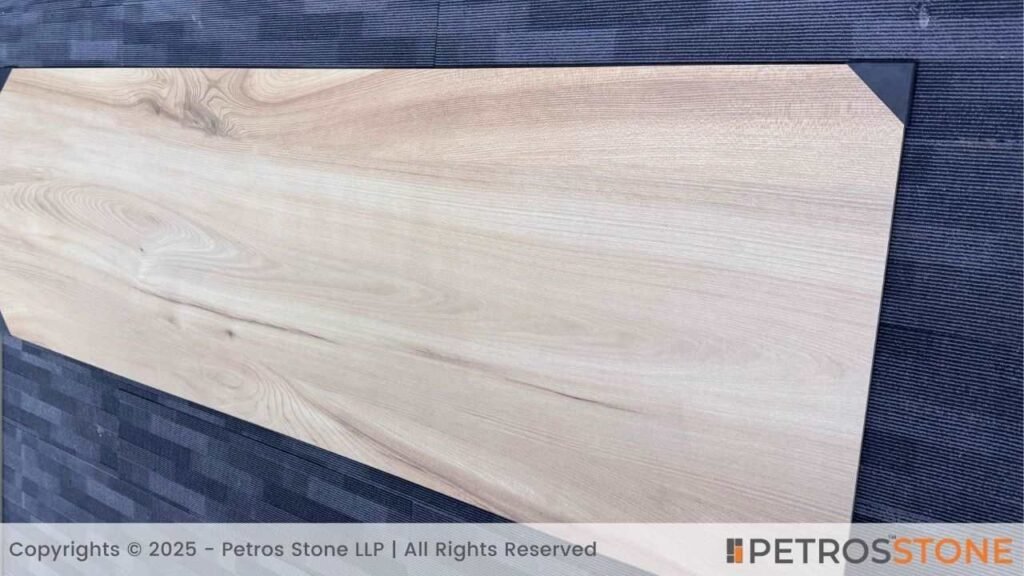
For generations, wood has been one of the most preferred building materials. However, owing to the risk of fading, warping, and termite attack, natural wood is often not recommended for cladding.
Sintered stone with a wood-grain finish lets you add timeless charm to your façade with a wooden look. With tones ranging from oak to deep walnut, you can add natural aesthetics to your design. The finishes include honed, polished, and matte surfaces, allowing you to make a choice per your aesthetics.
Read this article, 10 Best Sintered Stone Designs and Colors for deeper insights.
Expert Tips to Keep in Mind for Flawless Cladding
- When it comes to stone panels with a fiberglass back-mesh, use them for dry cladding. In case of breakage, this mesh prevents the broken pieces or chips from falling. An unmeshed panel works well in the wet cladding method.
- Before beginning the wet cladding process, make sure that the wall surface is clean, free from dust and moisture. It helps maximize adhesive performance.
- Lightly grind or abrade the back of the stone panels to improve the adhesives and sealant grip.
- Don’t leave the joints exposed. Ensure to seal them with weatherproof sealants as a preventive measure against water ingress.
- Make sure to maintain consistent joint widths unless specified otherwise, for a neat and uniform visual appeal.
- Choose industry-grade sealants for the cladding joints to ensure weatherproofing performance and a neat finish.
- For regions with high humidity or rainfall, prefer using an aluminum substructure for dry cladding. In case of coastal regions, ensure to use anodized aluminum profiles for durability.
- For a seamless look, use large panels and align the veins for a sense of flow.
- A dry cladding system offers an easy replacement of damaged slabs. It can be preferred for high-traffic and public buildings’ cladding over the wet cladding method.
- Sintered stone installation isn’t an ideal choice for a DIY project as it requires special cutting and installation techniques for the best performance. Always employ a skilled professional for the cladding to prevent any installation or long-term damage.
Why Does Professional Consultation Matter?
When it comes to cladding with sintered stone, professional consultation is non-negotiable. Here’s why:
- A skilled professional ensures safety compliance during installation and ensures the use of industrial-grade adhesives and anchor systems.
- Skilled labor minimizes the risk of costly errors in slab handling, cutting, and installation.
- The precise joints and sealing methods promise long-term performance of the material.
Set a Standard with Sintered Stone
Exterior cladding in sintered stone is setting new standards in terms of both aesthetics and functionality. While the ranging tones and patterns offer unmatched aesthetics, its engineering process promises durability even in extreme conditions.
However, understanding the key to proper installation is the key to longevity. Understand the methods, choose the recommended cladding technique, and follow precision at every step. Hire stone experts to tailor a cladding solution for lasting elegance.
Are you ready to lift up your building’s façade? Connect with us now.
Summary
When it comes to sintered stone installation, there are two primary methods– dry cladding and wet cladding. The choice of installation method depends upon several factors apart from budgetary constraints alone, for example, structural load, wind pressure, timeline, etc.
This article delves deep into each of the cladding methods, their specifications, and explores several thicknesses of sintered stone. Furthermore, it offers insights into different types of sintered stone and the unique style each imparts.
Key Takeaways
- Sintered stone is a preferred cladding material for exteriors due to its high durability, non-porous nature, range of colors, textures, and UV resistance.
- Buyers must consider the pros and cons of both dry and wet cladding methods to pick to most suited technique for durability.
- It’s critical to pick the right panel size and thickness for both function and aesthetics. For exterior walls, a panel thickness ranging between 6 mm and 12 mm is recommended.
- The wide range of colors, sizes, textures, and veining patterns encourages flexibility and experimentation in designing.
- Professional consultation for stone installation shouldn’t be neglected, as sintered stone demands specialized installation.

Brown Granite

White Galaxy Granite
Blue Bahia Granite
Silver Cloud Granite
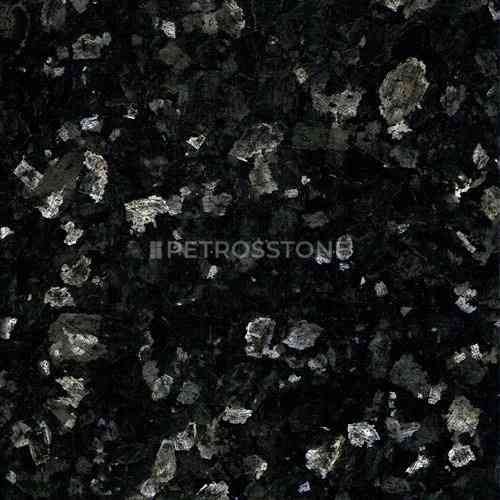
Black Pearl Granite
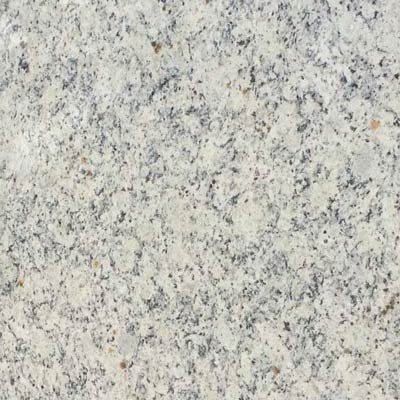
Dallas White Granite
